

SOLO Server Product Configuration
Product Configuration
Before you can begin issuing and activating licenses, you must define and configure the products and product options in SOLO Server which will be used to issue your application licenses. This topic is designed to guide you through adding your first product option and assumes you have already defined your licensing requirements. Once logged into SOLO Server, click on the Help - Manual menu on the top right to open the full contents of the SOLO Server manual. Most SOLO Server pages also have a "? Help" link located near the top right side which links to the manual topic pertaining to the current page.
In SOLO Server, a product is defined to describe your application as a whole and may contain one or many product options. For each type of license your application will support and require activation to use, at least one product option needs to be defined. In this guide, we will use an example product named "XYZ Product" with the following example licensing requirements:
- Self-issue 30 day evaluations.
- Requires activation for a non-expiring license after the evaluation has expired.
- Supports two different product options: a non-expiring license and a one-year subscription license.
First, you will need to login to SOLO Server:
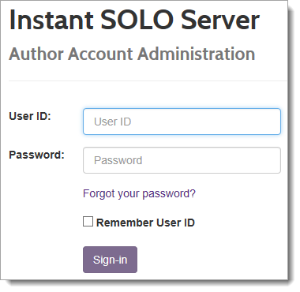
If you are using Instant SOLO Server Shared URL, login here.
CREATING A PRODUCT
Adding a product in SOLO Server is rather self-explanatory and simple. To get started quickly, follow these steps:
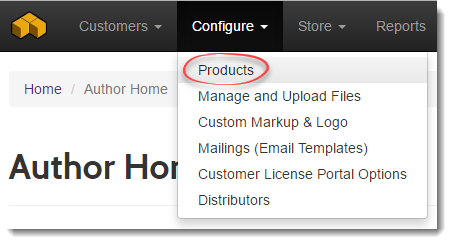
- From the SOLO Server menu, select Configure - Products.
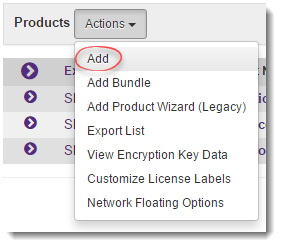
- Use the Actions drop-down to choose Add.
- Fill in the Product Name. The other fields are optional and can be updated later.
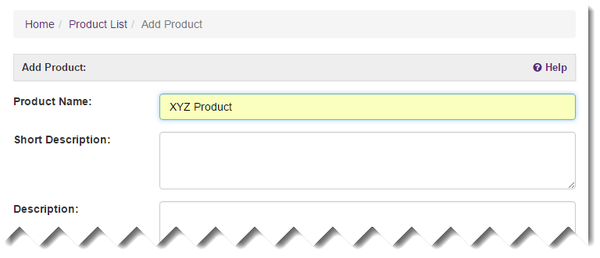
- Click the Submit button at the bottom.
CREATING A PRODUCT OPTION
- From the SOLO Server menu, select Configure - Products.
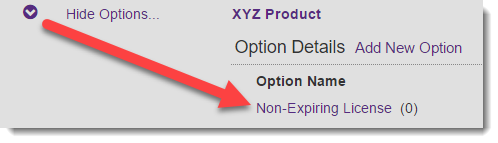
- Click Show Options... next to the corresponding product.
- Click the Add New Option link.

- A list of options will be available. Make the following changes:
- Enter the Option Name (i.e. "Non-Expiring License" in this example).
- The Product Option Type should already be set to Activation Code.
- Enter a Price per U/M (unit of measure), which applies if you are using the SOLO Server integrated shopping cart. You should always set the price to the normal purchase price or something greater than zero to prevent anyone from obtaining a license through the shopping cart for free. You can always update this price later.
- Activations per U/M is set to 1, which means a user can activate one computer. Update this value to allow a user to activate multiple computers or users with a single License ID.
- Optionally enable Allow Deactivations and set the initial allowed Deactivations per U/M.
- Click the Submit button.
When configuring your product options, ACSL requires the Issue Installation ID option to be checked! This is checked/enabled by default.
The product option configuration offers a plethora of configuration options not covered in this guide. Each of these options are documented in the SOLO Server manual which you can see by clicking the Help link at the top of the page within SOLO Server.
Creating Additional Product Options
It is possible to simply create additional product options the same way the first was created. However, it is better to duplicate existing product options in most cases. In this example we will create a one-year subscription license. This license will function the same as the non-expiring license, but after one year it will deactivate itself and require a new activation or renewal.
First, go to an existing product option:
- From the SOLO Server menu, select Configure - Products.
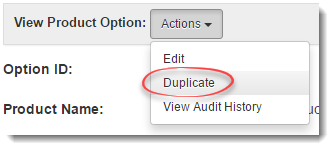
- Click Show Options... next to the corresponding product and click on an existing product option (Non-Expiring License in this example).
- Use the Actions dropdown and choose Duplicate.
- Enter a New Option Name (i.e. "One Year Subscription").
- Enter a New Option Price.
- If you are using the integrated shopping cart, the checkboxes may apply if you have configured those settings, otherwise they can be left unchecked.
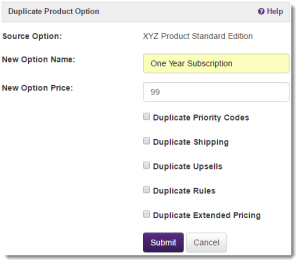
- Click the Submit button.
The product option is now duplicated. Click the Actions dropdown and choose Edit to make further updates to the product option:
- For a one year license, set the Days to D/L field to 365. This field is used to set a license expiration and it is also used as the expiration date for the file download through the Customer License Portal (which is an optional feature).
- In the Other Details section, uncheck Hidden and check Enabled. A duplicated product option is initially set to be hidden and disabled to allow you to make your changes first.
- Click the Submit button.