

Advanced Options
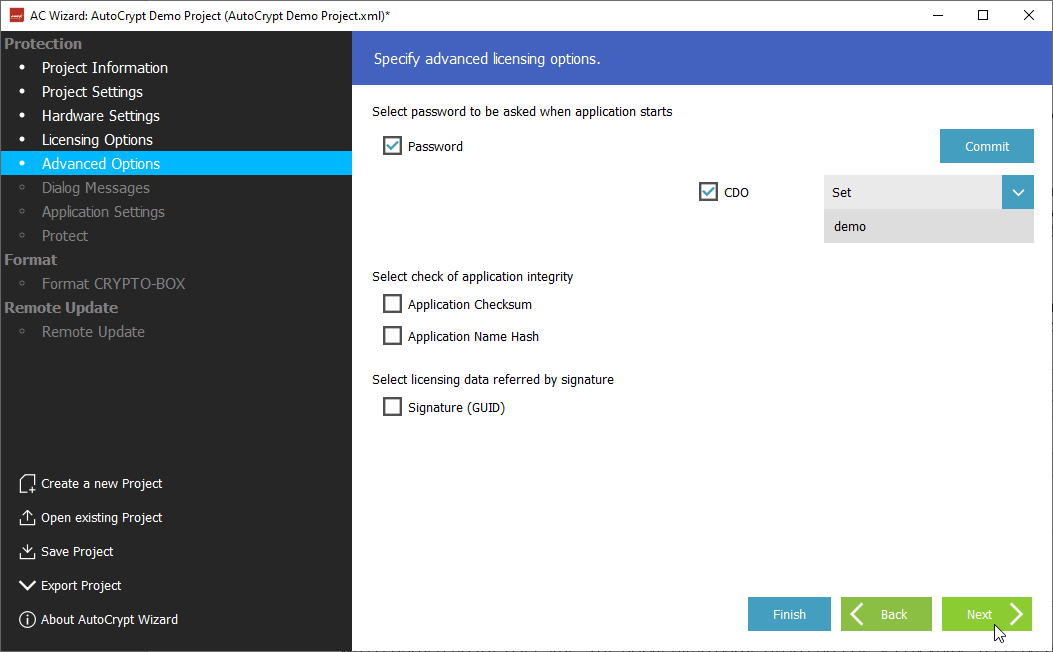
Password
This data object defines an application password which will be required every time the application is launched. This feature can be useful for additional security or as a "nag screen" when making demo versions.
Application Checksum
This data object defines a checksum calculated for the protected application file. Its value will be stored in the CRYPTO-BOX and used to check if the application was manipulated or corrupted, as well as prevent unauthorized modification. The checksum cannot be set by value; it is calculated automatically after successful application protection.
Application Name Hash
This data object is specific to AutoCrypt projects: it contains a hash value calculated for the name of protected application. This hash value will be stored in the CRYPTO-BOX and used to check if the application was renamed on the user side. The application name hash can’t be set by value; it is calculated after successful application protection.
Important Note:
Application Checksum and Application Name Hash should not be used if you plan to update your application regularly, because the new application will not be compatible with existing Checksum/Hash settings stored in the CRYPTO-BOX.
Signature (GUID)
This option is mainly for software developers:
It allows you to store an individual data block (up to 16 bytes length) in the CRYPTO-BOX memory (e.g. customer specific data) and provide it directly to your protected application – with minimal efforts!
The advantage of this approach:
there is no knowledge about the CRYPTO-BOX API necessary – just copy the code snippet from our sample source code to your application source code.
After license validation was successful the protected application will read the data from the CRYPTO‑BOX, decrypts it and writes it to a buffer signed with a unique signature which can be identified and read by the code you implemented into your application (see above).
A readme file with instructions and sample code can be found in the Protection Kit:
[Smarx OS PPK root folder]\SmarxOS\API\Win\Samples\ReadMemoryBySignature
Click “Next” to proceed to the “Dialog Messages” screen.